Windows
This page will take you through downloading, building and installing MediaElch from source.
Dependencies and Source Code
Before you can compile MediaElch, you first need to install its dependencies. These include a compiler, the source code and more.
Git and Source Code
MediaElch uses Git aus its version control system. Download and install it
from git-scm.com. The default values
of the setup guide are good.
Then open “Git Bash” and run the following commands. Lines starting with # are comments.
# Get MediaElch's source code
git clone https://github.com/Komet/MediaElch.git

# Change into the newly created directory
cd MediaElch

# Get dependencies
git submodule update --init
It should look like the following:

Clone and setup MediaElch’s source code.
Qt
Download the Qt online installer. On the download page, you will need to navigate to “Downloads for open source users” ➞ “Go open source” ➞ scroll down ➞ “Download the Qt Inline Installer” ➞ “Download”. You will need a Qt account to install Qt. There may be other sources for Qt which are not discussed on this page.
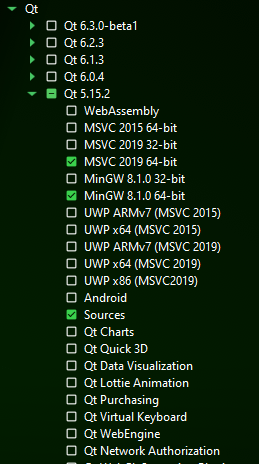
Run the installer and select Qt 5.15.2 (under section “Qt”) with the following components:
MinGW 8.1.0 64-bit
Sources
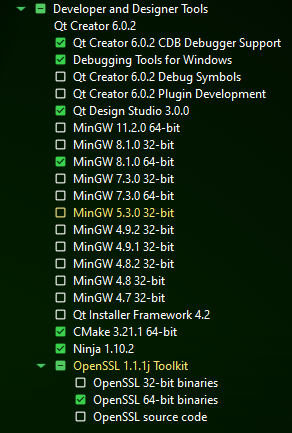
Furthermore, further down in the installer, select the following “Developer and Designer Tools”:
Qt Creator
Qt Design Studio
MinGW 8.1.0 64-bit
CMake
Ninja
OpenSSL 1.1.1j Toolkit
The installation will take a while. Below are screenshots that show how the installer will look like with the selected items.

First part of MediaElch’s Qt dependencies

First part of MediaElch’s Qt dependencies
Other Libraries
Download and install MediaInfo (DLL)
Download MediaInfoLib.
Either use Git to clone the repository or click on “Code” ➞ “Download ZIP”. Copy the folderSource/MediaInfoDLLtopath/to/MediaElch/MediaInfoDLLDownload ZenLib.
Either use Git to clone the repository or click on “Code” ➞ “Download ZIP”. Copy the folderSource/ZenLibtopath/to/MediaElch/ZenLib
Build
Open the MediaElch project (MediaElch.pro) using QtCreator.
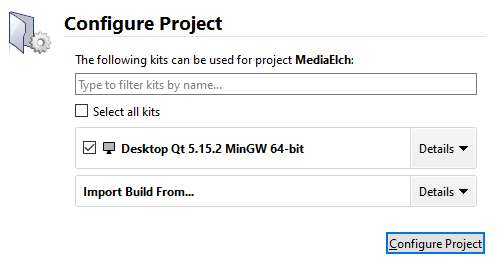
In the new window, configure the project using the default values
(should be “Desktop Qt 5.15.2 MinGW 64-bit”).

Qt Creator Configure Button
You can ignore any errors/warning regarding the command “sed”.
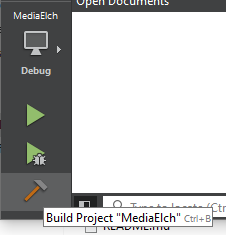
On the bottom left, click on the “Run” button. You can adapt the build directory in the “Projects” tab.

Qt Creator Build Button
If the build was successfull, MediaElch will start. Otherwise, read the error messages to see whether it may be an issue with your setup. It could be that the build directory could not be created or that a dependency is missing (for example QuaZip) if you haven’t initialized the Git submodules.
It may take between 5 to 20min to build MediaElch, depending on your machine.
ffmpeg executable
You have to download ffmpeg to be able
to create random screenshots of video files. After building MediaElch place
ffmpeg inside a new folder vendor which must be placed in the same
directory as MediaElch.exe.